Get an instant quote
Get in touch Listen to our podcast

Blog

10 3D Prototyping Tips for Global Buyers

A prototype can look convincing on screen and still fail in a buyer’s hands. A snap-fit may crack, a threaded hole may bind, or a thin wall may warp after printing. For global buyers, these small details can affect supplier comparisons, delivery schedules, and the next design decision. Good 3d prototyping starts with a clear purpose: test fit, appearance, function, or a combination of them.

The right process depends on the part and the supplier. Buyers should share measurable requirements, including dimensions, tolerances, material, finish, and intended use. A marked-up drawing can prevent costly assumptions. So can a short review of file formats, sample approval, packaging, and shipping timelines. Ask how the supplier checks critical features, and request evidence when a dimension matters. Details matter.

There is no single material or printing method that suits every project. A low-cost visual model may be enough for one review, while a functional test needs a more suitable material and production method. Even careful planning has limits: prototypes do not always predict final production behavior. That gap deserves attention, not a polished promise. The ten tips ahead offer practical ways to ask better questions, compare quotes fairly, and reduce avoidable surprises—while leaving room to revise the plan when the first sample says otherwise.
10 3D Prototyping Tips for Global Buyers

Define Prototype Goals, Performance Needs, and Target Markets

10 3D Prototyping Tips for Global Buyers

Define Prototype Goals, Performance Needs, and Target Markets

A prototype should answer a specific question, not merely look finished. Are you checking hand fit, assembly clearance, airflow, or impact resistance? Write down the test before choosing a process or material. For a handheld enclosure, for example, measure clip deflection and screw-hole alignment, then inspect both after repeated assembly. Small details matter. A realistic surface finish can hide weak joints, so appearance alone is not proof of performance.

Match test conditions to the people and places that will use the product. A part intended for a humid coastal market may need moisture testing; equipment used outdoors may require heat and UV exposure tests. Set measurable acceptance limits, such as maximum warping or minimum load capacity. Keep a record of material, print orientation, and post-processing. These details help teams compare results across suppliers. They can still miss real-world variation.

Market scale is growing, but it does not validate an individual design. Wohlers Report 2024 estimated the global additive manufacturing industry reached $20.035 billion in 2023, an 11.1% increase over 2022. Use that figure as context, not a sales forecast. Define the first target market narrowly, then test relevant user needs, shipping conditions, and service expectations. I would revisit assumptions after each prototype round; early specifications are often incomplete.


Prepare CAD Files and Choose a Suitable 3D Printing Process

For global buyers, a useful 3D prototype starts with a CAD file that communicates intent clearly. Set units explicitly, name parts consistently, and remove hidden or duplicate geometry before export. Small errors travel. A model designed in millimeters can become a costly surprise if a supplier reads it in inches. Include critical dimensions and tolerances separately; a visual model alone may not show which surfaces must fit together.

Tips: Export a neutral file format, then reopen it to check for gaps or missing faces. Mark the prototype’s purpose: appearance, fit, or functional testing. That choice guides the process. A recurring oversight is specifying tight tolerances everywhere, even where they add little value.

Choose a process around the part’s size, material needs, surface finish, and delivery schedule. Resin-based printing can capture fine details, while filament-based methods may suit larger, sturdier test parts. Powder-based processes can support complex shapes, but surface texture may need review. These are general trade-offs, not guarantees; machine settings and material grades vary between suppliers. Send a drawing with key measurements and ask the supplier to confirm achievable tolerances before production. One awkward detail may remain: a prototype can fit perfectly and still behave differently in real use. Test the intended load, temperature, or assembly conditions where practical.

Select Materials and Set Tolerances for Real-World Use

For global buyers, material choice should reflect the part’s actual working conditions, not just its appearance. A clip used near a warm motor needs different heat resistance than a display mock-up. Consider load, impact, moisture, UV exposure, and contact with oils or cleaners. Also ask how the chosen 3D-printing process affects strength: layer direction can make a part weaker across one axis. Feel the surface, inspect the edges, and test the feature that matters. A good-looking sample is not proof of reliable performance.

Tip: Share the intended use, expected temperature range, and any cleaning routine with your supplier. Name the material family, color, and finish, but confirm availability before approving the design. Material names can vary between vendors. That detail is easy to miss.

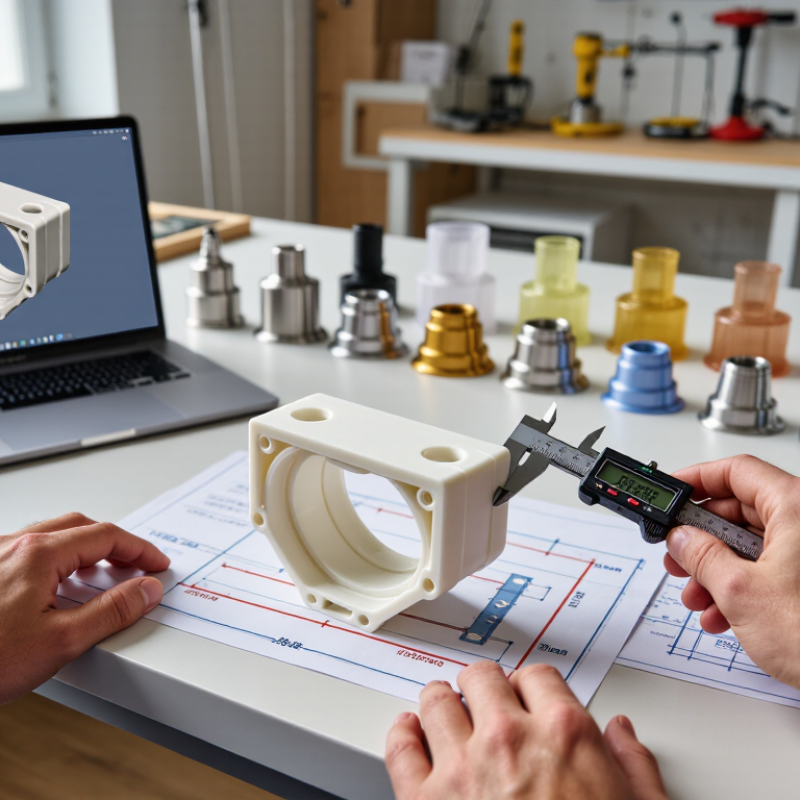
Set tolerances around function. A sliding fit, threaded insert, and cosmetic face do not need the same precision. Tight limits across every dimension can increase cost or cause avoidable rework. Mark critical dimensions on a dated drawing, state units clearly, and agree on how each will be measured. A caliper may suit an accessible outside width; a deep internal slot may need another method. Request a first-article check for critical features, then test assembly with the actual mating part. We sometimes over-specify early prototypes. Reviewing those limits after a fit test can reveal what truly needs control.

10 3D Prototyping Tips for Global Buyers: Account for Thermal Expansion

Thermal expansion can affect fit and clearance as parts move between temperatures. These representative coefficients vary by grade, print orientation, and test conditions; confirm the material data sheet and intended operating range before setting critical tolerances.

Evaluate Suppliers, Quotes, Communication, and Quality Controls

Global 3D prototyping depends on more than a low unit price. Ask suppliers which processes and materials suit your part, then request evidence from similar work. A quote should separate setup, material, finishing, inspection, and shipping costs. If a fee is unclear, ask for the assumption behind it. Small ambiguities can become expensive changes.

Tips: Compare suppliers using the same drawing and tolerances. Share the intended use and load conditions. Request a sample before approving a larger batch. Check whether quoted lead time includes finishing. Confirm units, file versions, and revision dates. Ask how defects are recorded and resolved. Agree on inspection points before production. Request photos of critical features. Keep decisions in written messages. Recheck the quote after design changes.

Quality controls need measurable criteria. Specify dimensions, surface finish, and acceptable variation where they matter. For example, identify the hole diameter that must fit a pin, rather than asking for “good accuracy.” Ask for measurement records on critical features, and clarify who approves deviations. A simple checklist helps, but it can miss a hidden issue. No process catches everything; leave time to inspect the first prototype and revise your assumptions.

Plan Reviews, Revisions, Shipping, and Cross-Border Compliance

Treat each prototype review as a decision point, not a general discussion. Before production, agree on what “approved” means: key dimensions, fit, finish, and intended use. Ask the supplier to mark changes on dated drawings or screenshots. Keep one revision code on the model, drawing, and purchase documents. Small mismatches matter. Check that the material and color match the latest specification. A physical sample can reveal fit problems that a screen review misses. Collect feedback from one decision-maker where possible. Scattered comments often create conflicting revisions. Set the number of included revision rounds and confirm added costs or lead time in writing. We sometimes focus too heavily on appearance; a simple fit check should not be skipped.

Plan shipping before the prototype is finished. Confirm the delivery address, contact details, package size, and protective packing method. Ask for a clear commercial description, accurate declared value, material details, and country-of-origin information. Verify tariff classification and documentation requirements with a qualified customs broker or relevant authority; requirements vary by destination and shipment. Do not label a prototype vaguely if a more precise description is available. Send documents to the recipient for review before dispatch. Share the tracking number and allow extra time for customs processing. A perfect model can still miss a review meeting. Keep a backup plan, such as a local digital review, if the parcel is delayed.

10 3D Prototyping Tips for Global Buyers - Plan Reviews, Revisions, Shipping, and Cross-Border Compliance

# Tip Planning and review action Revision guidance Shipping and cross-border check
1 Define the prototype’s purpose State whether the part is for appearance, fit, function, or pre-production evaluation before requesting a quote. Use separate acceptance criteria for visual finish, dimensions, and functional performance. Confirm the declared description reflects the item’s actual prototype use and material.
2 Share a complete design package Provide a neutral CAD format such as STEP, plus a dimensioned drawing, units, revision identifier, and critical tolerances. Record each approved file’s revision and date; avoid reviewing parts against superseded files. Keep the commercial invoice description consistent with the physical item and supporting documents.
3 Select the process for the test Match the process and material to the question being tested; printed parts may not reproduce the properties of a final molded or machined part. When performance matters, document the material grade, build orientation, and relevant post-processing. Check whether the material or any coating requires safety data or other shipment documentation.
4 Agree on tolerances before production Identify only the dimensions that matter to fit or function, and agree how they will be measured. Review measurement results against the agreed drawing and method, not an assumed universal tolerance. Include any inspection report needed for receiving or engineering review in the shipment plan.
5 Schedule review gates Set review points for the design package, first article, and final pre-shipment condition; assign one decision-maker for consolidated feedback. Allow about 1–3 business days per internal review as a planning target, adjusting for team size and complexity. Reserve time for document checks and customs clearance in addition to production and transit.
6 Make feedback specific and consolidated Annotate photos or drawings with location, measured value, required value, and priority for each issue. Separate required corrections from optional preferences to reduce avoidable revision loops. Send approved changes in writing and update the file revision before authorizing another build.
7 Plan revisions as a controlled cycle Estimate the number of review cycles and identify which changes require a new part rather than a digital edit. For each revision, track the change, reason, approval date, and impact on cost and schedule. Recheck the invoice quantity and description if the revised shipment differs from the original order.
8 Protect parts for transit Specify protection for fragile features, surface finishes, and parts that can deform or abrade in transit. Request packing photos for delicate or high-value samples and inspect promptly on arrival. Use a complete delivery address and recipient contact details; confirm the chosen service supports the destination.
9 Prepare customs information early Before dispatch, review the commercial invoice, item description, quantity, declared value, and country-of-origin information. Ask the customs broker or relevant authority to confirm tariff classification; do not guess an HS code. Import duties, taxes, required declarations, and clearance procedures vary by destination and item.
10 Check destination-specific compliance Identify whether the prototype will be tested, demonstrated, or sold; obligations may differ by intended use and destination. Keep material declarations, test records, and design revisions together for traceability. Verify applicable product, chemical, labeling, and import requirements with the destination-market authority or a qualified compliance adviser.
Planning note: Review intervals are suggested targets, not guaranteed service times. Shipping schedules, customs requirements, duties, and compliance obligations depend on the route, item, and destination.
CNC machining CAD export file formats

Put your parts in production today

Get an instant quote